Log cabins
  Summer houses
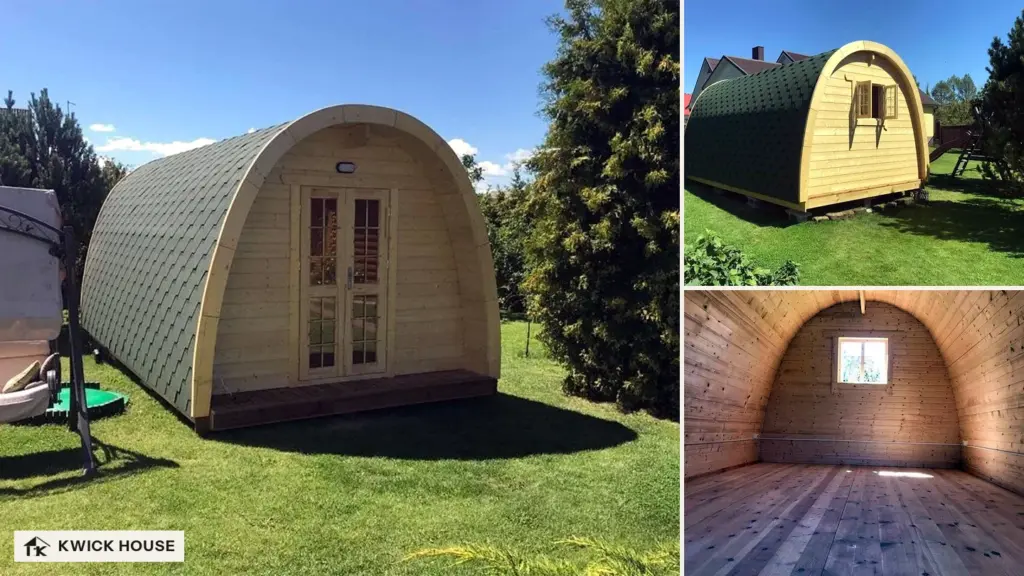
  Glamping pods
  Garages and carports
  BBQ huts
  Outdoor saunas
  All kits


How to build a log cabin kit, step by step
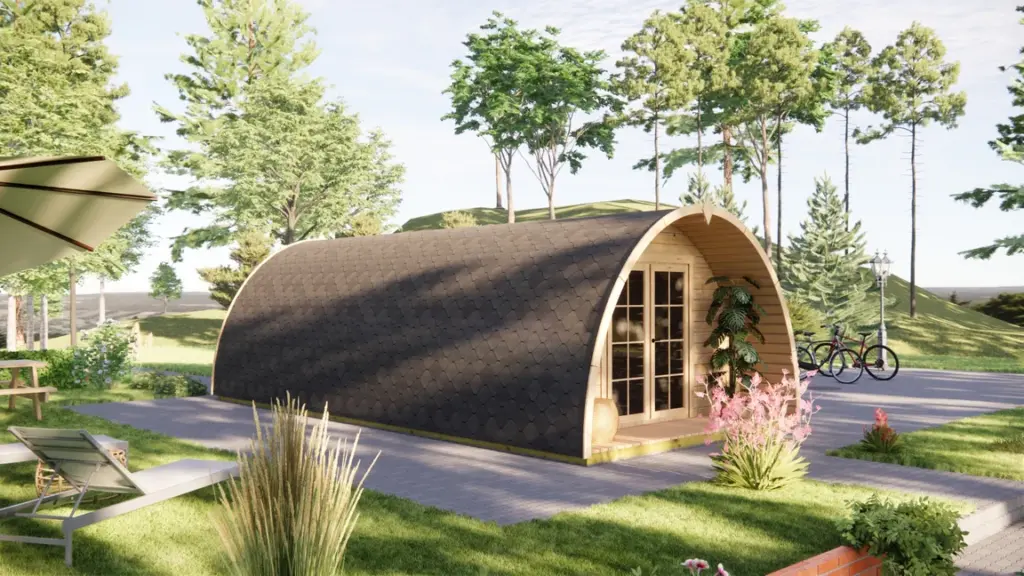
Two people usually build the shell of a log cabin of up to 40 m² from a KWICK HOUSE kit in 3 to 4 days once the base is ready. This page follows one kit from the floor plan to the finished shell, using sheets from the step-by-step instructions that come with it. The kit is our Glamping Pod 8m x 4m, 32 m², 1 Bedroom. The sheets are the ones a buyer of this model receives, shown here without the order details.
- Up to 40 m²
- Two people, 3 to 4 days
- Over 40 m²
- Three or four people, 2 to 3 days
- Parts
- Structural parts numbered to the drawings
- Missing parts
- Replaced free of charge, within 2 weeks
Need help with assembly? Write to us and we will reply within two working days.
Why the example is a pod
The Glamping Pod 8m x 4m, 32 m², 1 Bedroom is the example because its walls go up the way a log cabin's do. The log cabins, summer houses, glamping pods, garages and saunas have 44 mm tongue-and-groove wall logs laid course on course (one clad log cabin has 34 mm wall sections instead), and you find each structural part by its number. The roofs differ, the BBQ huts have a wall profile of their own and the carports have no log walls, so their instructions differ too.
We publish this one example only. The full instructions, drawings and parts list for your model come with the kit.
Before you start
A building of up to 40 m² is usually a job for two people over 3 to 4 days, and one over 40 m² usually takes three or four people 2 to 3 days. Those days cover the shell only, with the roof covering and finishing to follow. This pod is 32 m², so it falls in the first group.
The wall logs fit together, tongue into groove. Some joints are screwed, and the fixings come with the kit.
Before the first piece goes down, the base has to be level and finished. No kit includes one, and our How It Works page sets out who does what. The lorry has no crane, so you unload the pallets with a forklift or a telehandler (see delivery and payment). Check the delivery against the parts list as soon as it is off the lorry, so you find a missing part before you need it. We replace a missing or damaged part free of charge and send it within 2 weeks.
The build, sheet by sheet
Worked example
Glamping Pod 8m x 4m, 32 m², 1 Bedroom
- Outside size
- 8,000 x 4,028 mm
- Floor area
- 32 m²
- Wall logs
- 44 mm
Read the floor plan
The plan gives the outside size of the pod, 8,000 x 4,028 mm, and places the walls on a grid: numbers 1 to 4 along the length, letters A to C across it. The instructions name walls by these marks, so wall B is the wall on line B.
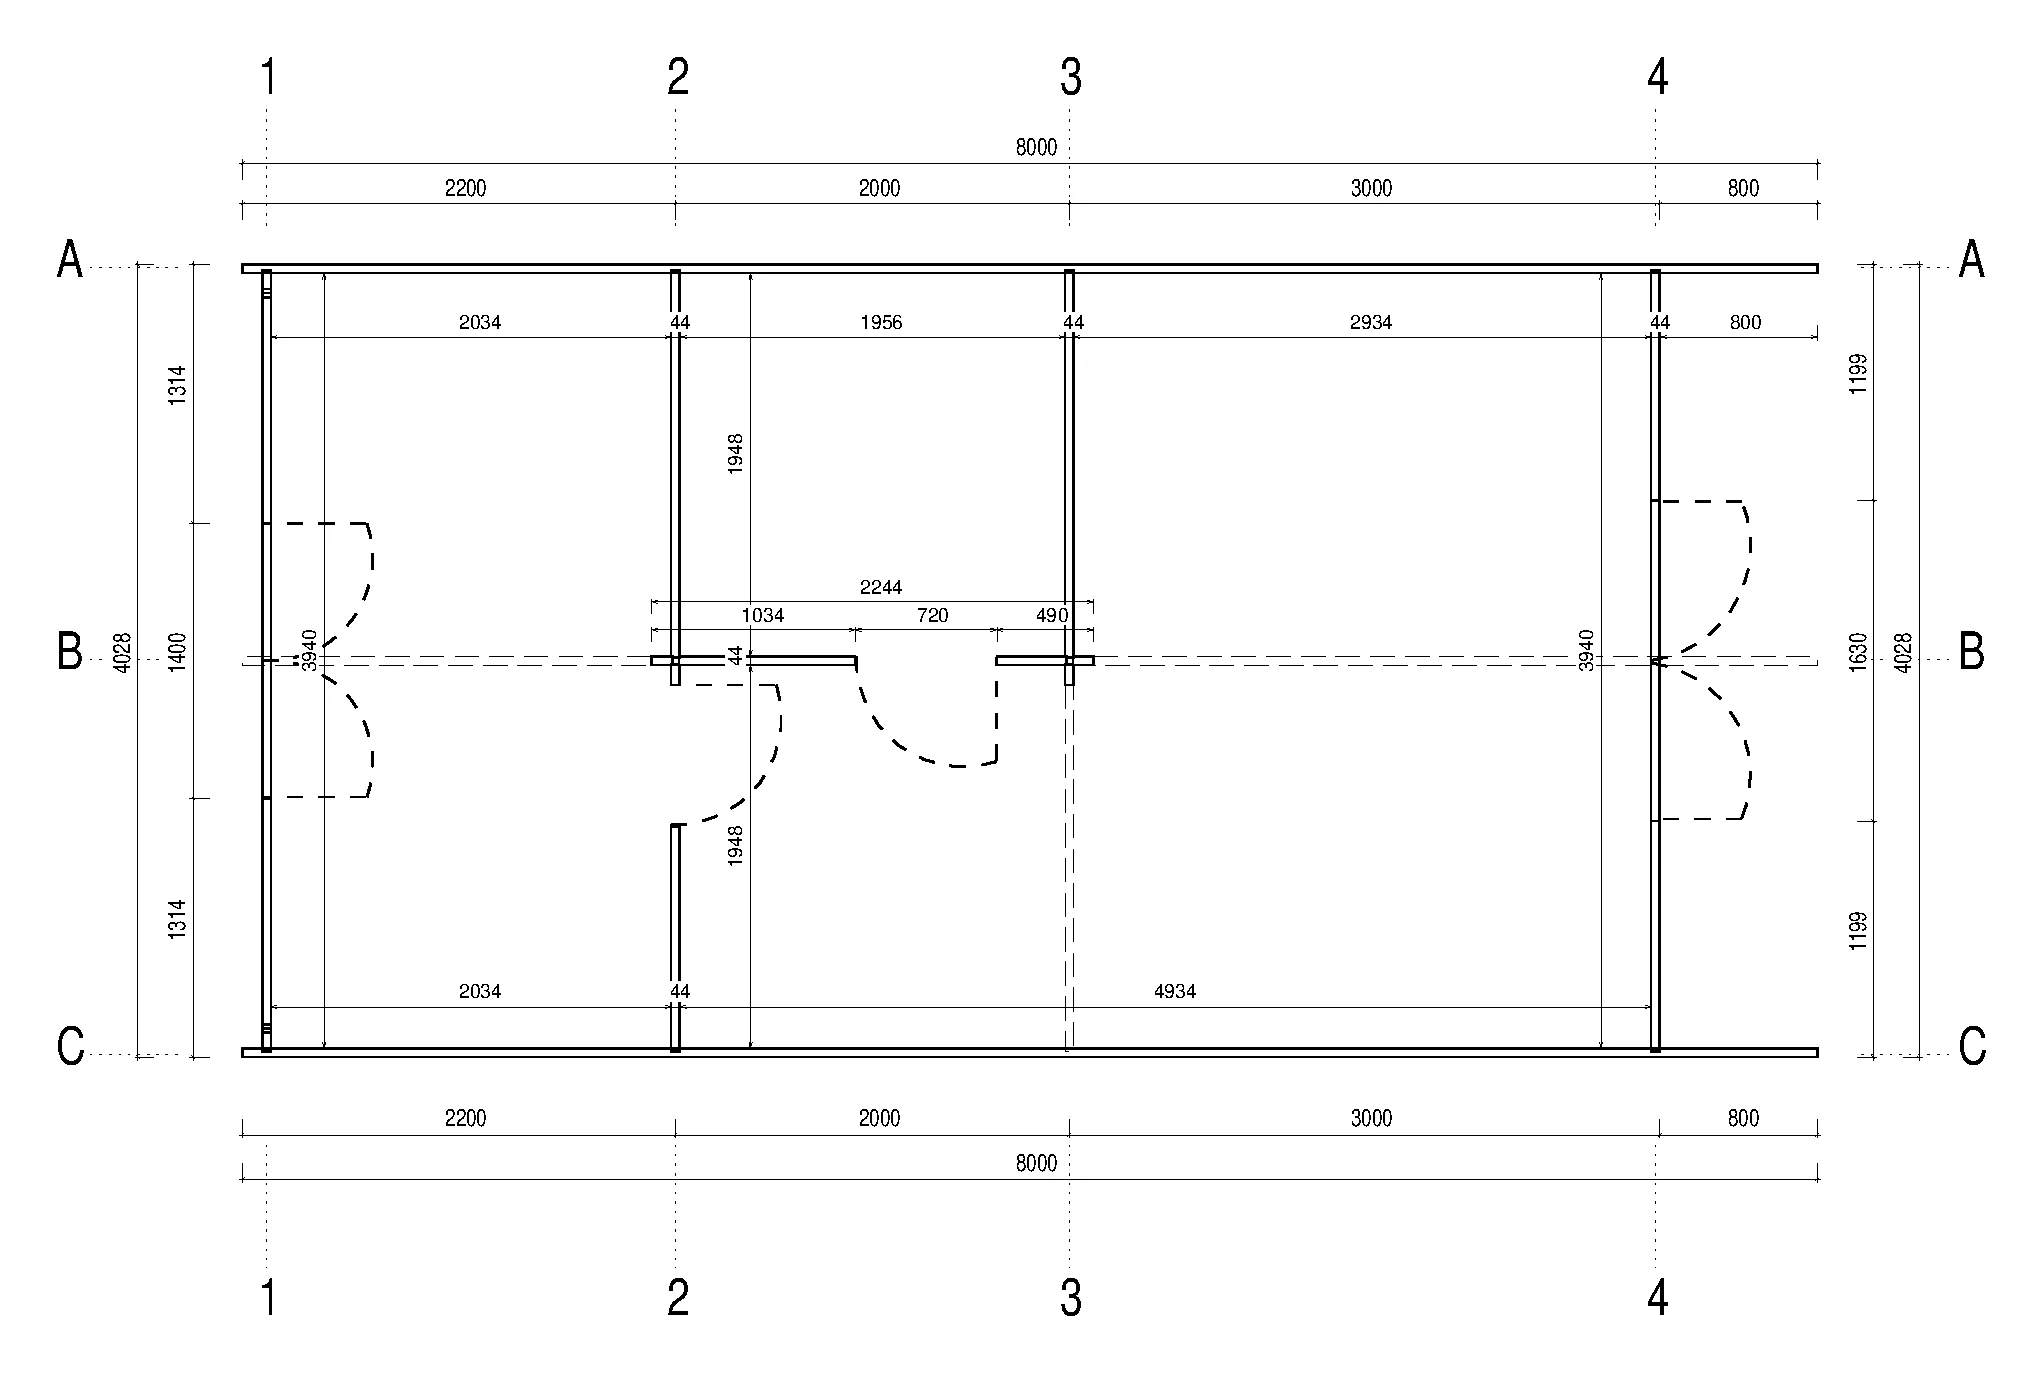
Two arched partitions, on lines 2 and 3, divide the length into sections of 2,200, 2,000 and 3,000 mm, measured between the grid lines. Beyond line 4, 800 mm of floor continues outside the double door, under the arch.
Lay the base frame
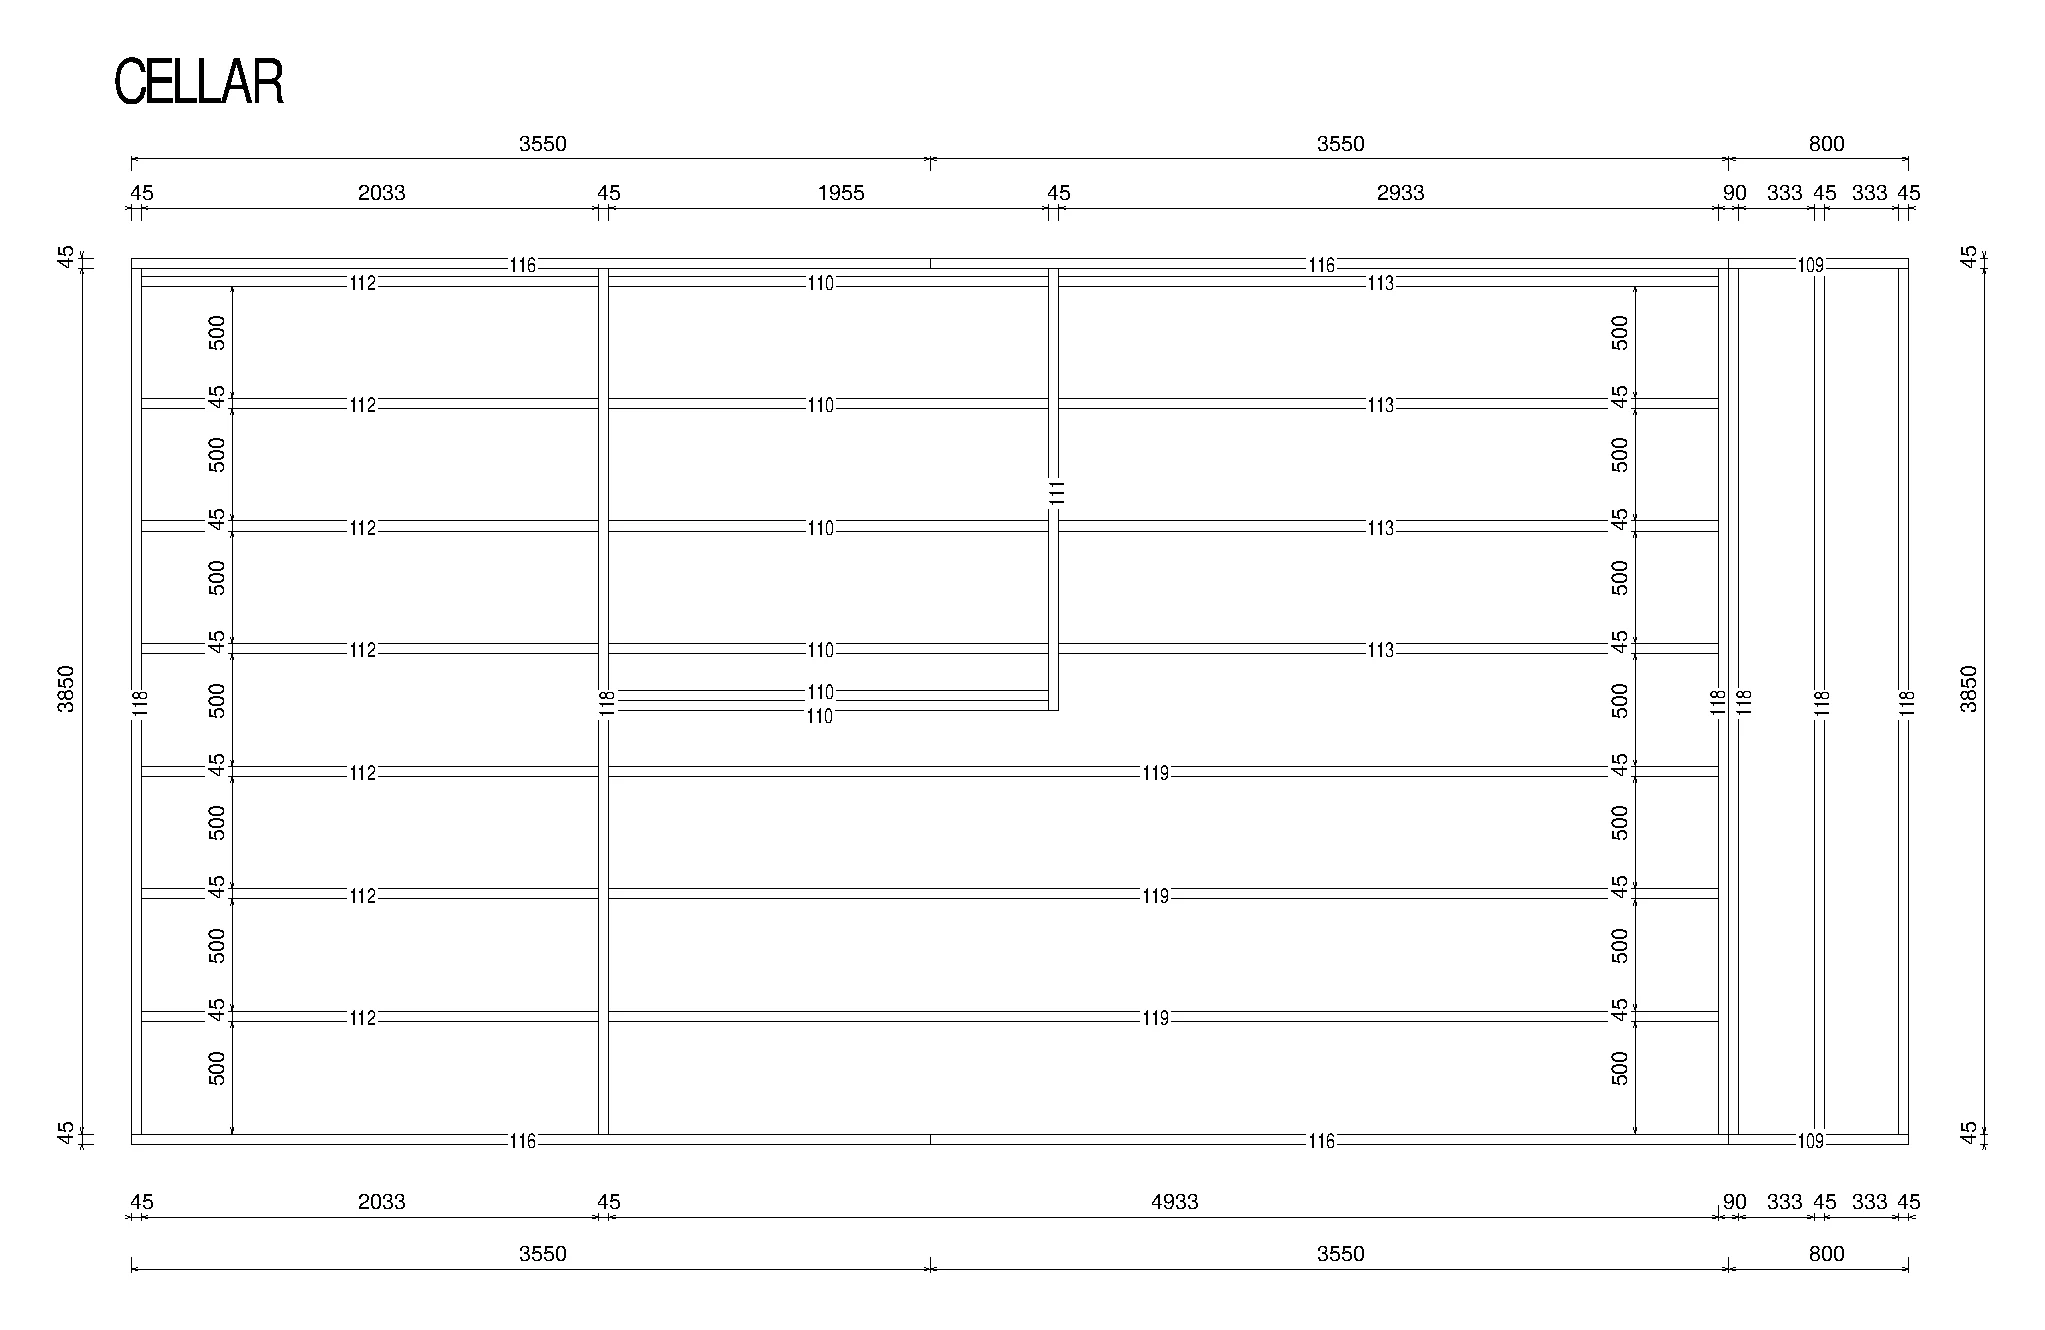
The base frame goes down on your base. It is a grid of 45 mm timbers at 500 mm spacing, and each timber on the drawing carries its part number, such as 110, 112 or 116. Get the frame level before you go further, because the walls take their line from it.
Lay the floor boards
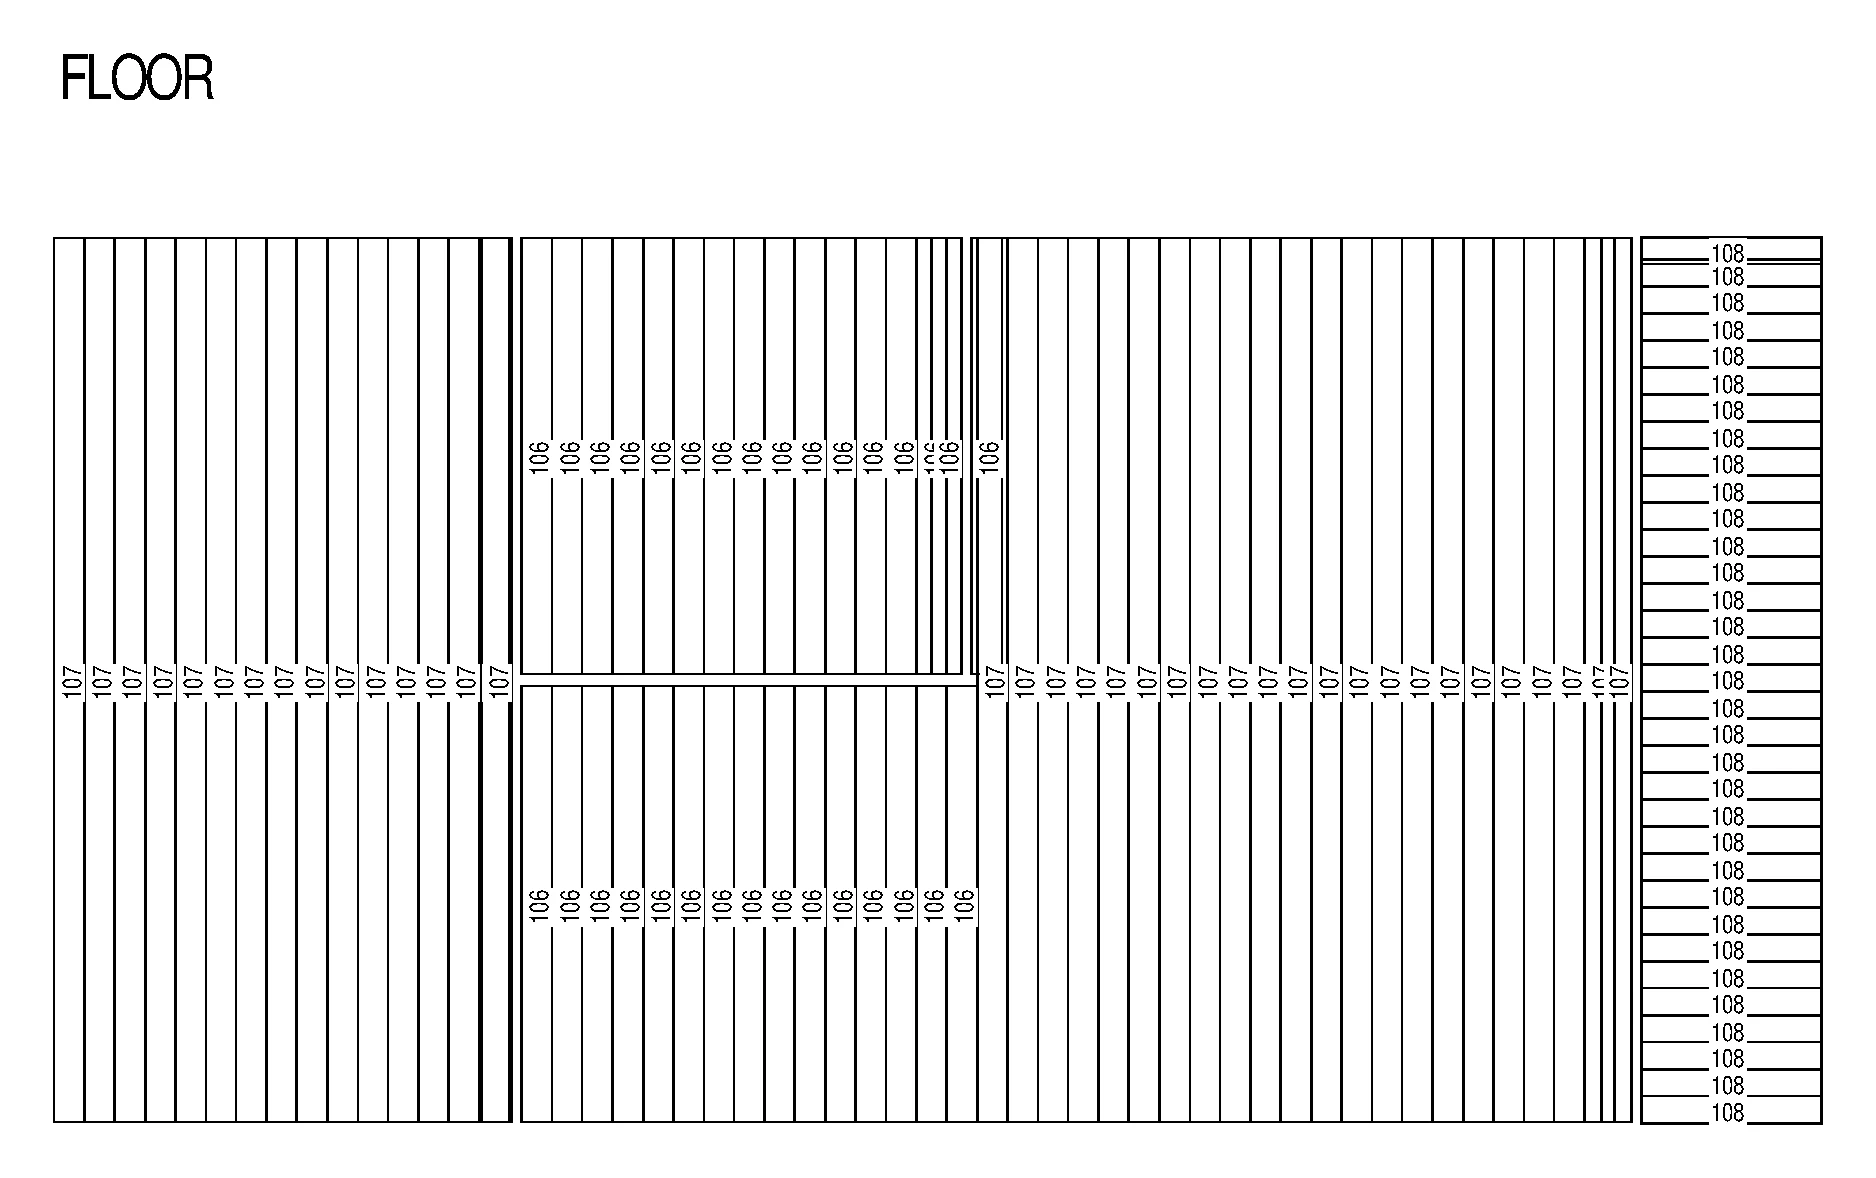
The floor boards are 18 mm tongue-and-groove. The drawing marks them 106, 107 or 108, and many boards carry the same number: a number names a part, and the parts list says how many of it there are. The boards numbered 108, on the floor outside the door, run the other way.
Stand the inner arches and wall B
The instruction sheets call this step 1: their numbering starts once the floor is down. The two inner arches, panels 2 and 3, go up first, with wall B between them. Wall B is the short partition on line B, between the two arches, and it takes the internal door, which comes with the kit.

Build the end walls course by course
The end walls, panels 1 and 4, go up in stages: five courses in step 2 of the instructions, six more in step 3. Some roof boards are fixed on temporarily at this stage, as the sheets show.


The drawing of end panel 1 shows how the numbers work. Each course has its own number, and the numbers do not run in order up the wall: from the bottom they read 2, 48, 53, 58, 61, 66. You take the part the drawing names, not the next one on the stack. Where the window opening cuts a course in two, both halves carry the same number.
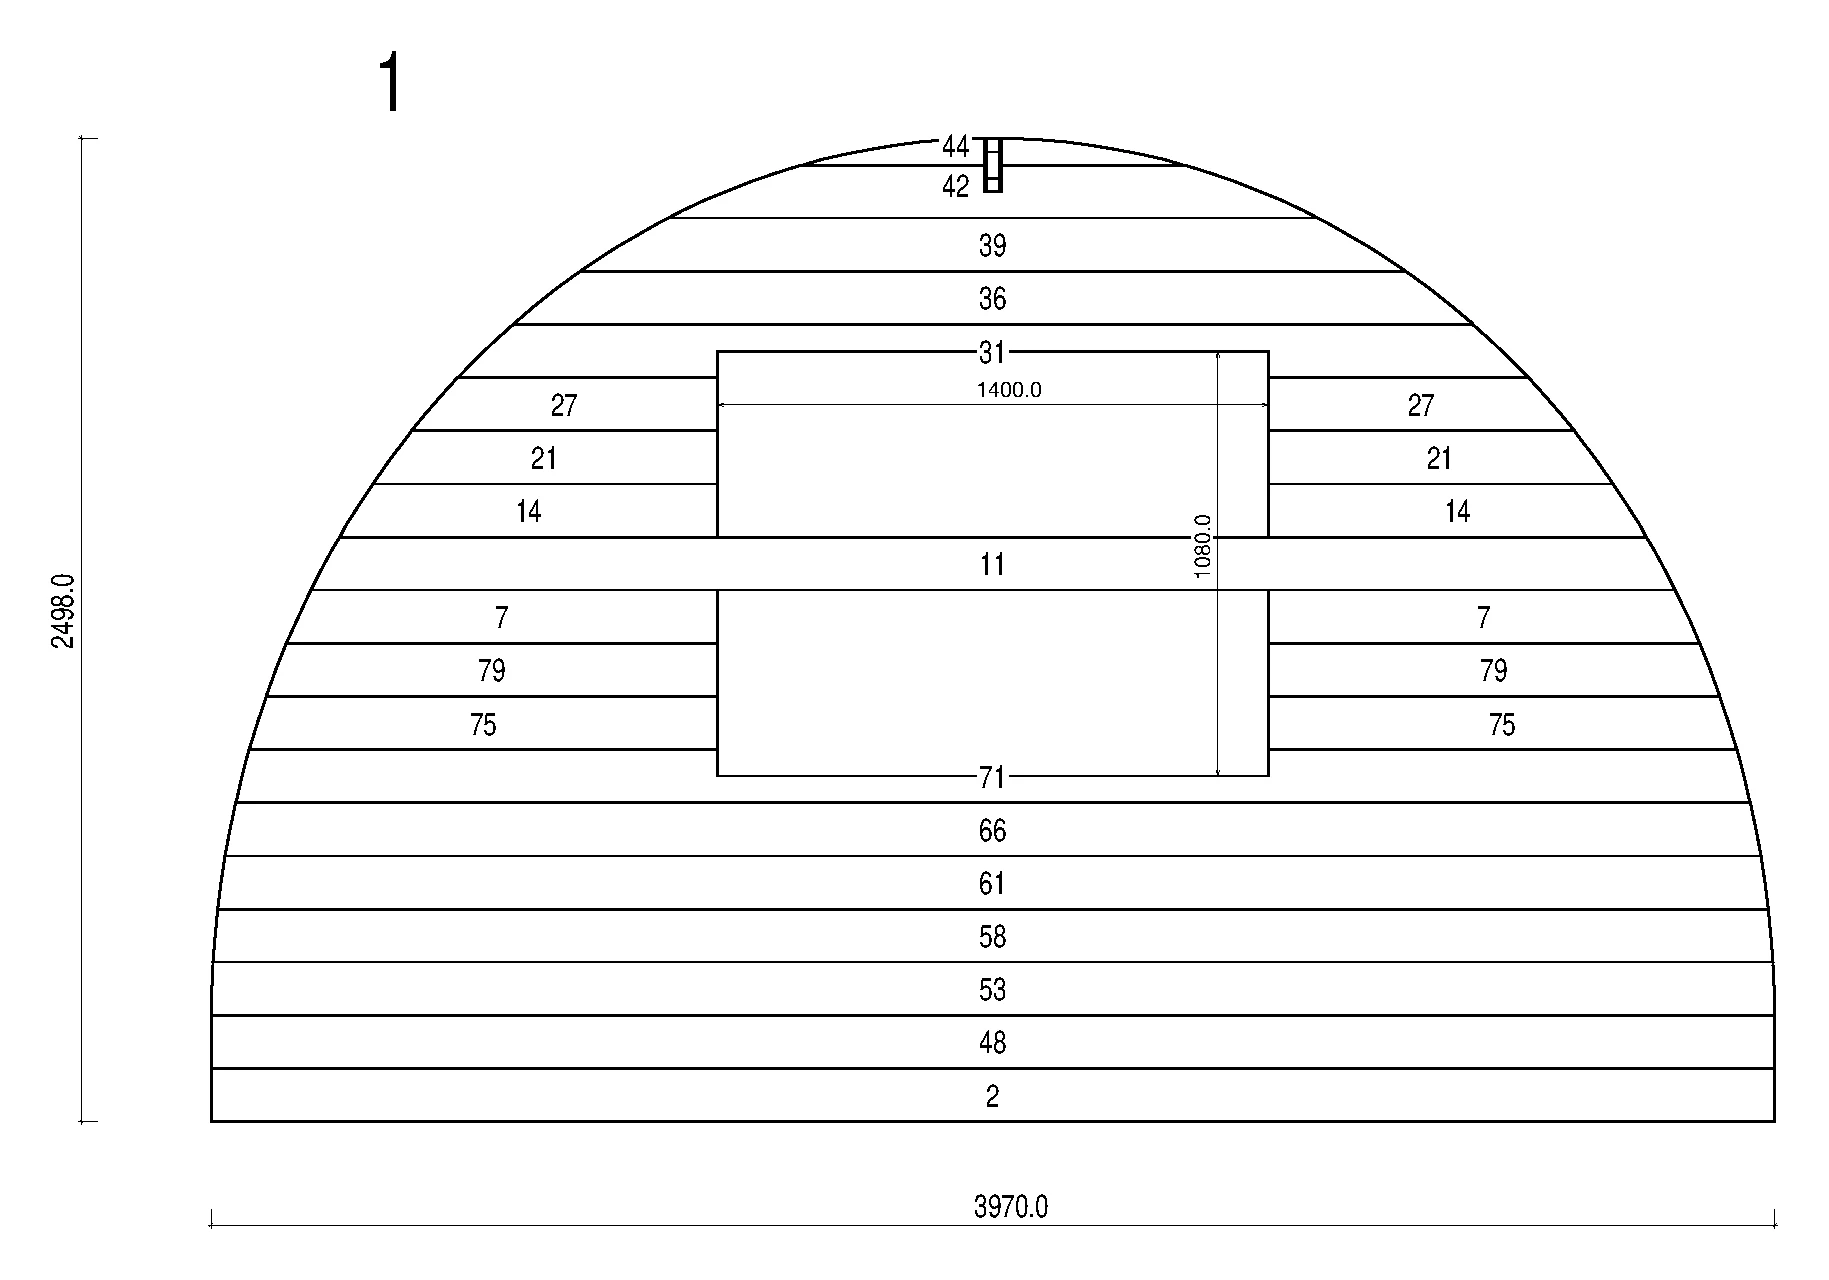
The walls of a log cabin are straight rather than arched, but they go up the same way: log on log, tongue into groove, by number, with openings left for the windows and doors.
Finish the end walls and fit the top pieces
Step 4 of the instructions takes panels 1 and 4 to full height. Parts 104 and 102 are then fitted along the top, while the temporary roof boards stay in place.

Fix the roof boards
On an arched pod the roof boards form the sides as well as the roof. They are 18 mm tongue-and-groove and go on from the top down, screwed to each arch. The dots on the sheet show where the screws go, in a line along each arch.

The roof covering goes over the boards afterwards. It is not in the kit price: on this pod, bitumen shingles are an optional extra.
Fit the windows and doors
Windows and doors arrive as finished units and go into the openings left for them. On this pod the window, 1,380 x 1,050 mm, and the double external door, 1,610 x 1,920 mm, are in the end walls. The internal door, 700 x 1,920 mm, goes into wall B.

Fit the end trims
On the last sheet, curved trim pieces marked A to D are fitted around both arched ends. That completes the shell.

Everything after the shell is yours to fit: the roof covering, whether it came with the kit or you buy it separately, and the insulation if you ordered it. The timber arrives bare, so you paint or treat it yourself, in any colour. Electrics, water and heating are not part of any kit.
Buildings with straight walls
To build a log cabin from one of our kits, you follow the pod's order until the walls reach full height. The floor goes down on its frame, and the walls rise course on course with openings left for the windows and doors. Where a pod has arches, a log cabin has gables, roof timbers and roof boards, and windows and external doors, where you have ordered them, still arrive as finished units.
A summer house, garage or sauna is built on the same pattern, with its own sizes and its own number of sheets. The instructions for your model follow its drawings.
What the instructions give you
A KWICK HOUSE kit comes with step-by-step instructions for its model, like the sheets above, with drawings of the walls and a parts list. The instructions and drawings are in English. The structural parts are numbered, and the same number appears in the parts list and on the drawings, so you can find a piece from either. Some of the material, including boards and battens, comes by the metre rather than as individual pieces.
Questions about the build
Can one person build it?
Our build times for a KWICK HOUSE kit assume at least two people, and we have no figure for one person working alone.
Can I see the full instructions before I order?
No, only the sheets on this page are published, and the full instructions for your model come with the kit. If you want to check something before you order, write to us.
Need help with assembly? Write to us and we will reply within two working days.